Hello there, I'm back with a model kit. I am notorious for getting the itch to build a model kit and then lose interest in it. Problem is, I don't have the patience to paint and wait paint and wait and wait and wait. Well over the years I picked up some experience painting cars, mostly recently painting my race car. I painted it outside my house. Yes outside. How? I used lacquer paint which dries in minutes. If it works well on real cars it must be good on small ones too. So I decided to start using lacquer paints on my kits. I messed up a couple of kits finding a good paint. I've now found my favorite. It's Rustoleum Auto paint. Excellent fast drying stuff. Super glossy. I picked up primer, White and Clear coat. Anyways, on with the kit.
DAY 1:
So now we move onto the fun part. Painting the body. I like to do this first since this is what you wanna make sure comes out looking good. Because no matter how good it is inside and underneath, it's sh!# unless the outside looks good.
First step was to scuff the plastic body with 400 grit paper under running water. Sand down any unwanted mold lines. This kit has a few running down the fenders. Air dry the body. Then carefully attach the body onto a piece of cardboard so that you can lay it down and pick it up without touching the body. Mist it with primer in a quick sweeping motion making sure you start spraying before you sweep by and let go after you sweep over the body. You never want to start or end your spray over the body.
You'll notice that the finish of the body looks a tad rough. This is ok, the light mist of the primer dries so quick that some lands on the body almost dry causing a dusted look. Take a look and see if there are any imperfections that need to be sanded down. Primer is great for pulling imperfections out into view.
I had not sanded down a mold line enough so I took some sandpaper to it. Again under running water to get a clean sand. Repeat the primer process. If you are happy with the results, you can now grab a real fine sandpaper (I used 2000 but you could use slightly coarser) This is to level off the finish of the primer to get a smooth base coat. You may even want to pass an hobby knife (carefully) or toothpick through the panel lines if they are getting clogged with paint.
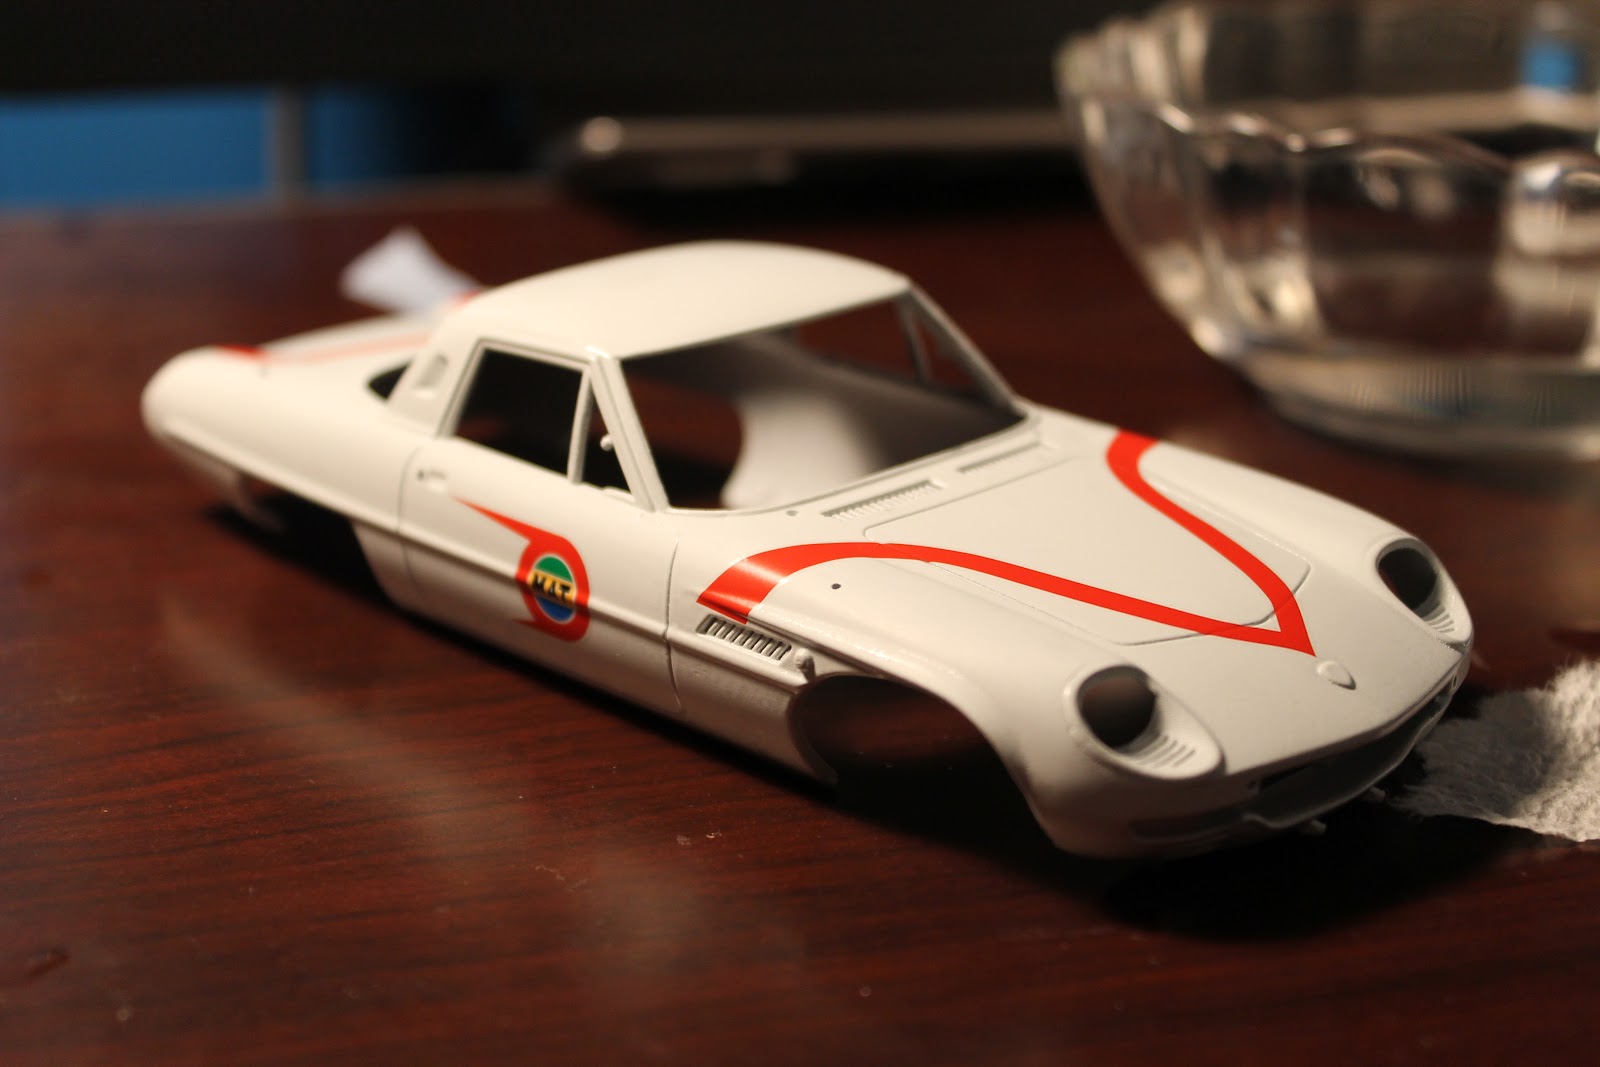
DAY 2: Now you can attach your primered and prepped body back on the cardboard and spray a couple of coats of base color, then sand carefully with 2000 grit paper under running water to level off paint. Reapply a thicker coat being extra careful not to run it thick. You don't need too much since you are applying a clear coat afterwards. Just enough to hide the primer.
After applying the base coat, I sanded it down smooth with 2000 grit to get a smooth surface for the water transfer decal to stick to.
I started bt cutting out the piece that I wanted to put on first. I let it sit in water for about 40 seconds until it started to slide off the paper.
I then CAREFULLY applied it to the hood. These decals rip easily so be careful. To make it easier to line up, I wet the hood and used a wet cotton swab to move the decal around. Once in position I dabbed it with a dry cotton swab. Then I let it dry and continued on with the other decals.
At this point it's looking better but the paint looks dull and rough. Don't get discouraged though. This is normal. The clear coat will make things all better.
This is where things get scary. The kit comes with what I believe are photo-etched metal emblem decals. Amazingly small and detailed. You need to cut them out and peel off the backing. There is a clear film over them to allow you to see where you place them. Be darn careful. You only get one chance to put em on and most likely wont come off easily if you mess up. These things are wonderful otherwise because they are thick enough to give a raised look to them.
Oh yeah there's more of these. See the Mazda logo? Yeah that's one of those delicate metal decals. I tried a trick I learned putting stickers on my real race car. Wet the body and decal, place decal and slide into place then squeegee the air/water out. Since this decal is micro small, it was only necessary to wet a tad but a risky proposition as I had no clue how the adhesive would react. Well, luckily I got it centered in one shot. Patted it down and breathed a sigh of relief. I also had to add that MICROSCOPIC key lock above the Mazda logo.
Once I placed all the stickers on, I made sure there was no dust or hair on the body. It was time to seal the base coat and decals. I reattached the body to the cardboard and went downstairs and lightly misted the clear-coat on because I had painted the hood emblem using enamel and I didn't want the lacquer melting in and causing blue veins in the clear coat. once the mist coat dried, I laid the coats on thicker until I got a nice gloss. Be extra careful as you can get carried away trying to get a nice gloss coat. Don't go nuts because you can always wet-sand the clear coat and then use a polishing compound to achieve a wet look.
My efforts yielded a satisfying gloss, but as with anything that is painted, there is always a chance of dust landing and causing a bump or two. Also, Orange peel looks out of scale in a 1:24 scale car. Wet sanding should smooth down the clear coat. Wet sanding the clear coat should be done carefully, you don't want to sand through it and hit the white paint or worse....the decals. Thus you want a decent layer of clear coat that is thick enough to wet-sand and thin enough to not clog up your panel lines.


No comments:
Post a Comment